The Only Pizza Dough Recipe You Need

Who said you couldn’t impress guests with pizza? They would definitely be impressed if you bake it at home, from scratch. Don’t worry, its the easiest thing in the world. I’d say its easier than baking a cake. In fact, the chemistry between the toppings, sauce and cheese is so simple and familiar – this might become your favorite to impress anyone stat.

The best thing about making pizza at home is you can roll out your desired thickness for the base, you can shape it the way you want (try pizza cones), you can experiment with what you want on your pizza (switch regular pizza sauce for pesto or curry) and most importantly, you can choose your own toppings and the amount (no guilt with extra cheese). Another amazing thing about pizzas are you can throw in any cooked leftovers with the right kind of sauce and you might just discover your favorite kind of pizza. I would recommend you to experiment with butter chicken and spicy tandoori sauce, top it off with generous amount of cheese and coriander.

What You Need:

2.5 cups (400 g) of All Purpose Flour
2 tablespoons (30 ml) of Vegetable Oil
1 cup (250 ml) of Warm Water
2 teaspoons (10 ml) of Granulated Sugar
1 teaspoons (5 ml) of Dry Yeast Powder
Salt to taste

Method:

  1. Combine all the ingredients mentioned above to form a dough. You can use a blender or use your hands, as per your convenience.

  2. Work the dough, generously using your knuckles, for about 10 minutes or more.

  3. Take a bowl, glaze the inside of the bowl with oil. 

  4. Make a ball of the dough and place it in the bowl, rub a little oil on top of the dough.

  5. Cover the bowl and allow it to rest for 20 – 30 minutes.

  6. Later, the dough is ready to be rolled into pizza bases. You can use a rolling pin or your hands to make a pizza base. 

  7. Over the base, spread pizza sauce, add your toppings and cheese.

  8. Place it in the oven for 10 – 15 minutes at 230 degree Celsius. 

  9. Enjoy your homemade pizza !

Thank you for Reading this Post!  Hope you find this helpful. If you have any questions, comments or questions, feel free to comment here or fill the contact form.
Have a Wonderful Day! 😊

Bake these Super Easy Chocolate Chip Cookies With Me! 

Chocolate Chip Cookies are my favourite. And, I know I am not the Only one. Here is My Super Easy, Super special and No Fail recipe. I like my cookies crunchy outside and soft inside. This recipe works good for other kinds of cookies too, you can replace the chocolate chips with Walnuts to make wholesome walnut cookies.


Preparation Time: 1 hour 15 minutes 

Makes: 20 cookies, each of 5cm diameter

What You Need :

(in order of requirement in the method)

1 cup of Unsalted Butter, softened (not melted)

1 cup of Brown Sugar 

1/2 cup of White Sugar (regular sugar)

2 medium sized eggs

1/2 teaspoon of Vanilla extract 

2 cups of Flour 

1 tablespoon of Salt 

1 teaspoon of Baking Powder 

2 cups of Chocolate Chips or Crushed Milk Chocolate bits

1/2 cup of Crushed Walnuts or Cashews (optional) 

1 tablespoon of full fat Milk (optional)

Baking Paper 
Equipment Requirements:

Baking Oven

1 Large sized Bowl

1 Medium Sized Bowl 

Spatula, Table spoon and Tea spoon

Baking Tray 

Blender

Note:

I used Cadbury Dairy Milk Silk for the chocolate chips. Instead of Unsalted Butter, I used Regular Salted butter from Amul and skipped the salt in the recipe. Walnuts add crunch to the cookies.

Method :

1. Preheat Oven 320° c 

2. In a large Bowl, take the softened butter and add brown sugar and white sugar to it. Mix really well. Use a blender to form a creamy mixture. 

3. To the large bowl, add the eggs and mix thoroughly. 

4. Next, add in the Vanilla extract and mix again. 

5. In a separate bowl, combine the flour, salt and baking powder.  Add these to the large bowl, Fold by Fold. Mix thoroughly. 

6. Using a spatula or spoon, fold in the Chocolate chips, walnuts and milk. Do not use the blender in this step. Our cookie dough is ready.

7. Spread the baking paper over your baking tray. 

8. Place about a 2 tablespoon of the cookie dough on the tray. A two table spoon dough makes a single cookie of 5 cm diameter. So, make sure there is ample of space between each cookie dough. Don’t over overcrowd the baking tray.

9. Bake in the Oven at 320°c for 12-15 minutes. Keep an eye on the cookies in the oven for any burning, as ovens and their features vary – my oven directions may not be exact for your oven.

10. Once they are done, place the cookies in the chiller or just keep them out for a while. Allow them to cool off. 

ENJOY! 

You can save these cookies in a cookie jar for a munch later. They taste fresh and lovely even after 3 days.

Thank You For Reading !

Hope You find this helpful !
If you want to ask me any questions or give suggestions, please feel free to share your thoughts at thecontact pageor you can inbox me at wingsiwrote@gmail.com .

Discover Fondant Cakes with Muffin County, Mysore

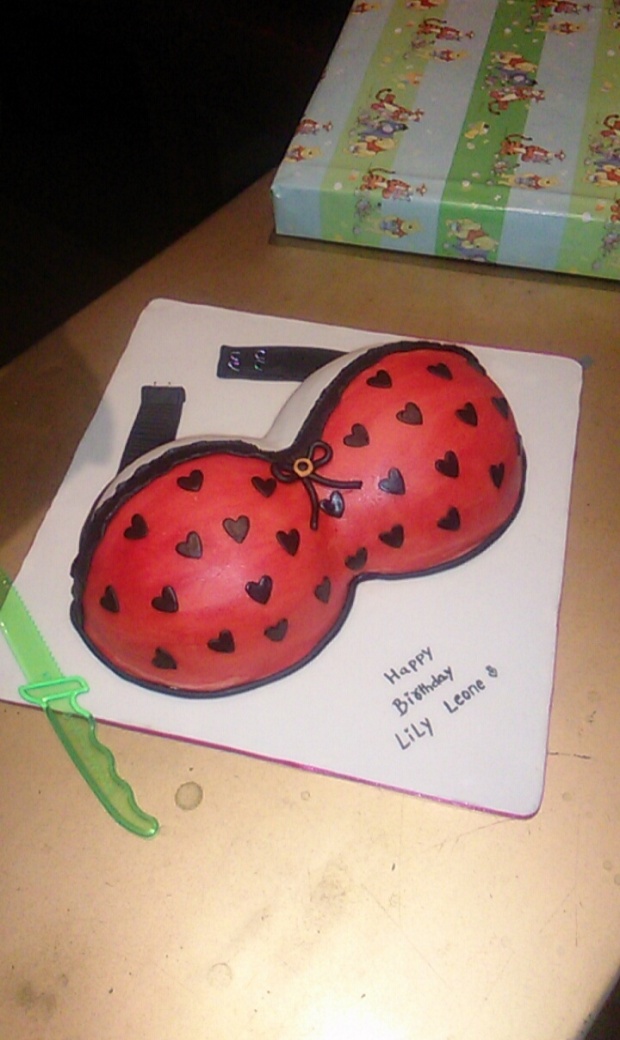
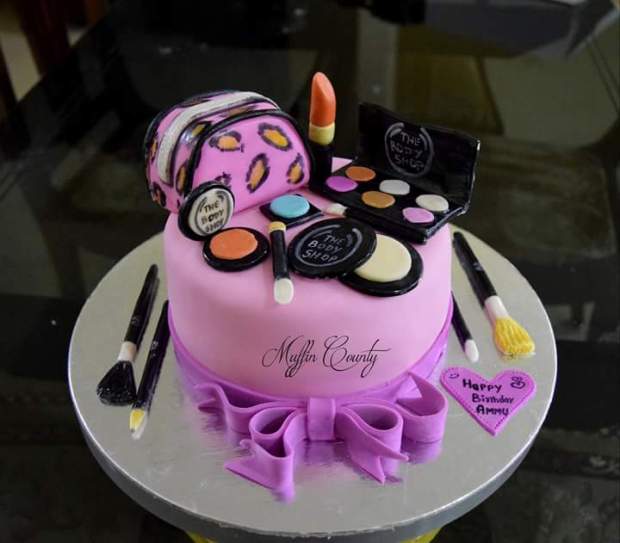
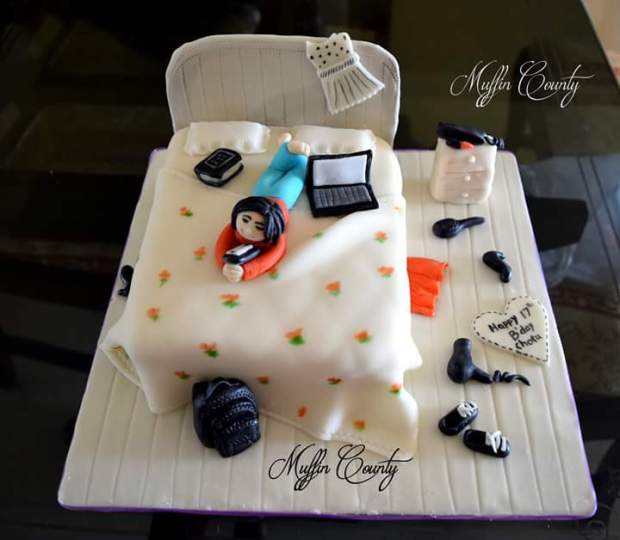
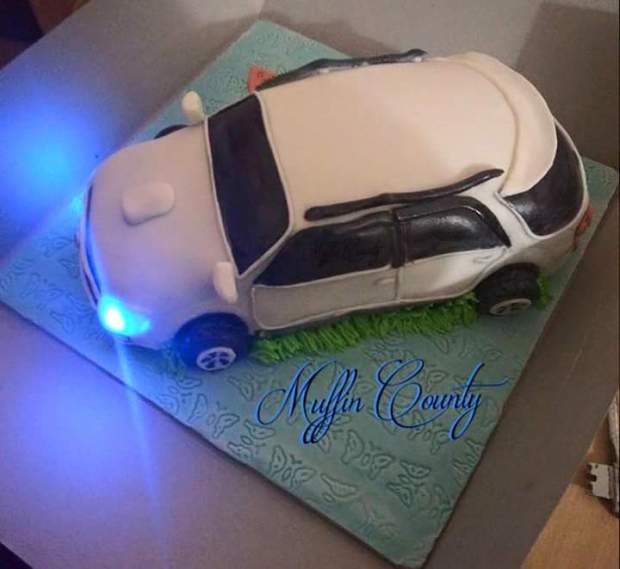
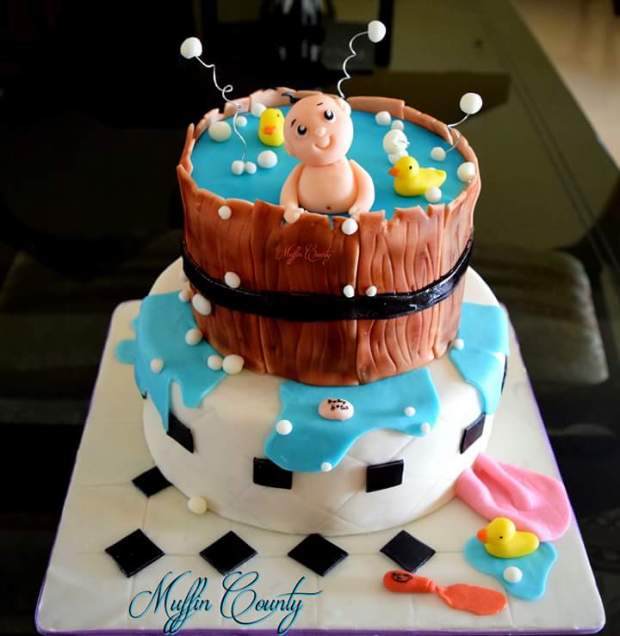
We all have fantasised over the pretty Cakes we see on television and social media. When I was a little girl, the most sought after cake was an edible doll dress… The standards have changed so much now and with the moldable fondant in play – the doll, her dress, her house, her shoes, her hair – all are made edible.

image

Although Fondant Cakes are popular and common, they are still rare in small cities and towns in India. Recently, for a friend’s birthday I was hunting for a Baker who could bake a specific design I wanted… And that specific design could only be done in fondant. After a couple of calls, I learnt about  this home Baker in Mysore, who went by the name Muffin County. [Thanks to my Ultra Humble friends at Fairy’s Touch Cakes ]


I searched for the Baker’s Facebook Page and found some pretty impressive Fondant Cakes. The reviews also screamed 5 stars. Soon enough, I got in touch with MITRA – founder and baker at Muffin County and explained her my idea.

There are several pros and cons of Ordering a cake from a Home Baker.
Pros: The cake will always be fresh and exclusive. Home Bakers are passionate about what they do, unlike cake shops, so they always put in a lot of love and effort in their baking. You can be sure that- your specifics will be taken care of specifically, they respect your choices.
Cons: They don’t usually keep flavour samples for you to taste and choose from unless you go for their exhibitions, as they believe in fresh baking. Delivery services are usually not available. Their Locations can be tricky, as they live in residential areas.

Now, let me tell you a thing about fondant icing – it’s definitely pretty but, it can never taste as good as a well baked cake. So, I knew I was taking a risk as I had never tried their cakes before and fondant doesn’t taste like anything but, sugar. All I was sure of was – it’s going to be pretty and for the taste of the cake… Well, I just prayed.

When I asked her for flavour options, I was really amazed by the long list of flavours in cakes and frosting, she texted me.
Here are the flavours –

Regular Flavours :
Vanilla ,
Pineapple ,
Strawberry and
Orange

Exclusive Flavours :
Chocolate with Choco butter cream ,
Chocolate  with Choco chips,
Chocolate with Salted Caramel ,
Chocolate with Strawberry  ,
Chocolate with Rum sauce,
Chocolate with Choco mousse,
Chocolate  with Strawberry,
Chocolate and Orange marble cake,
Butterscotch ,
Blueberry,
Black Currant, and
Lychee

Exotic Flavours :
Roasted Almonds  with Honey,
Chocolate with Rum butter sauce ,
Pistachio  with Rose Buttercream, and
Red velvet with Cream Cheese

P.S. – All of These are available as Eggless Options.

{Flavours might change depending upon the time you read this post }

I chose Chocolate Cake with Chocolate Mousse. It was the first time I had heard about that combination – I felt since both the components taste good on their own, the combination would be a hero. Although, I wasn’t sure at all on how the cake or the mousse tasted like from Muffin County.

image

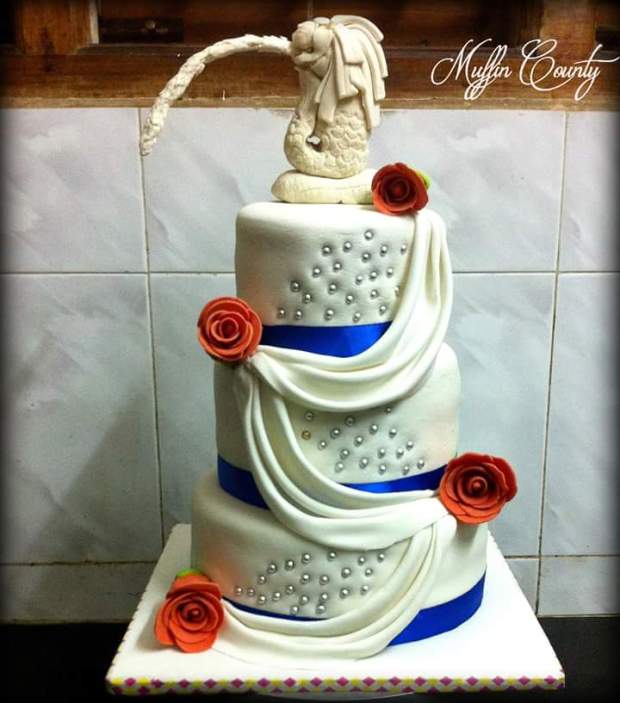
The Judgement day arrived and after the birthday song ended – I finally had a big… Big….sigh of relief. The cake was spectacular – it was everything I had wished it to be. It was beautiful and the fondant pattern was delicate and exactly what I wanted. The chocolate cake inside tasted fresh and moist. The lightly sweetened chocolate mousse with a melting soft texture – balanced the sweetness of the fondant and the cake. It was a hero combination after all. And that’s when I realized,  sometimes all you need is a little leap of faith.

image

Contact Details:

Mrs Mitra
Muffin County
General Thimmaiah road,
near Yoga  Narasimha Swami Temple,
Vijayanagar 2nd Stage ,
Mysore – 570017
Phone/WhatsApp no. +91 95 35 993191

You can find more about Muffin County on their Facebook Page.

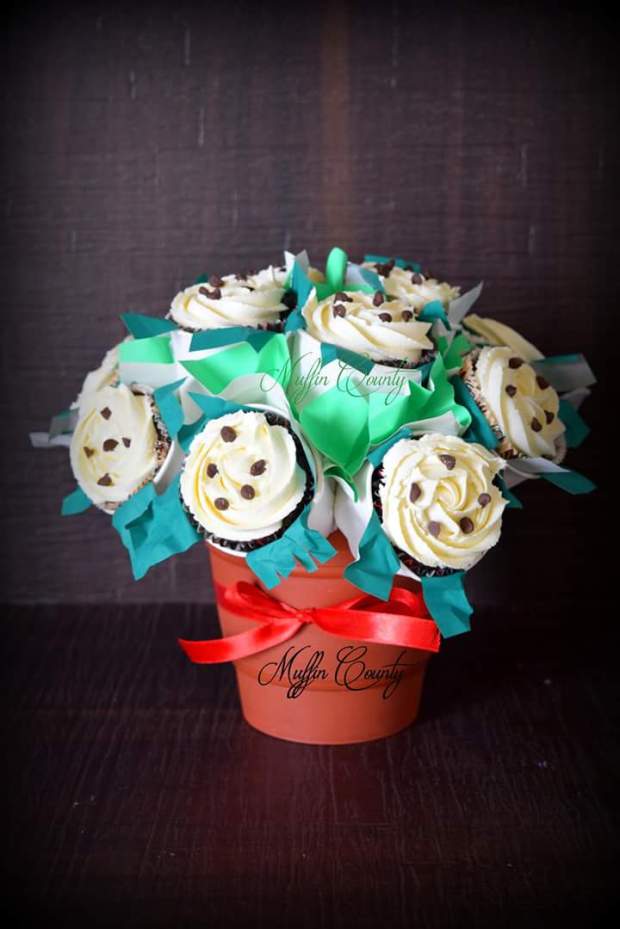
Here are some of my favorites by Muffin County :

image

image

image

image

image

image

image

image

image

Thank you for Reading this Post!
If there’s a place you want me to review or try, do let me know. Feel Free to Share your thoughts! You can comment here, fill in the contact me page or inbox me at wingsiwrote@gmail.com
Follow my Journey by Subscribing!


Bake The Best Mud Cake Ever with Me 😊

Hello Lovely Readers!
How are you doing? 
The Festive season seems to be over 😔, but you don’t need a festival to splurge over the mud cake I am talking about. 😇
Don’t worry this recipe is ‘No Fail ‘. You don’t need special baking skills, all you need is desire to bake, an oven and the ingredients. You will fall in love with the rich moist flavour and the softness of the cake – that I bet won’t be easy to share.😜

I know usually the recipes you find online are not reliable but this one is. I promise. And dont worry about expenses, its going to be pretty light on your pocket.

HEAVENLY CHOCOLATE MUDCAKE

What You Require :
An Oven: preheated at 300°F or 150°c
A Stove
Pan with a cup of water
Heat safe bowl: Big enough to fit over the pan
Measuring Cup, whisk etc.
Baking Dish: About 8 cm in diameter and 10 cm deep
Parchment paper/baking paper/the alternative*
A Knife, to check if the cake is done.

*The alternative: grease your baking dish with butter and lightly dust flour over it – A thin layer will be formed which will prevent the cake from sticking to the dish.

Ingredients :
(in order of need)
1 1/4 Cups or 250g – Unsalted Butter
8 ounces or 250g – Chocolate
2 3/4 Cups or 550g – Granulated Sugar
2 tablespoon – Instant Coffee Powder
3/4 Cup or 175ml – Hot Water

1/2 Cup or 125ml – Milk
4 – Medium sized Eggs

2 Cups or 300g – All Purpose Flour
1/2 Cup or 55g – Cocoa Powder
1/2 teaspoon – Baking Soda
2 teaspoon – Baking Powder
1 teaspoon – Salt
2 tablespoons – Vegetable Oil

Method:
Preheat your oven as mentioned before.

Step 1:
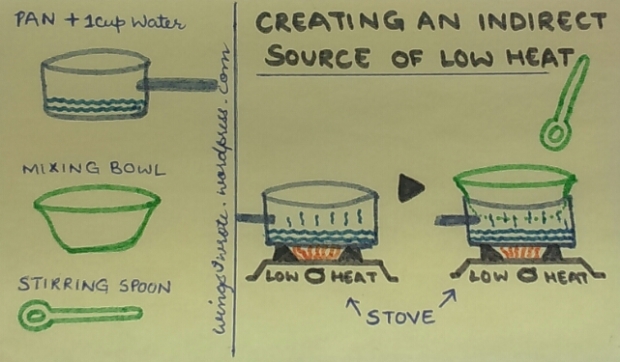
On the Stove, place a pan with a cup of water, keep it on low heat. Over the pan, place your mixing bowl.

image

This is done to create an indirect source of low heat, inorder to prevent the ingredients from burning or cooking. We just want the ingredients to melt.

Step 2:
To the bowl,  Add Butter, Sugar and chocolate. Let it all melt.

Step 3:
In a cup, add instant coffee to the hot water to create a solution. And, add this to your mixing bowl (step 1 and 2)

Step 4:
Once all the ingredients have melted into a uniform smooth mixture, take your mixing bowl off the Stove.

(Melting may take time, so to save time you can do step 7, while monitoring the bowl over the pan. You can come back to this, when you are done with step 7 )

Step 5:
Add Milk to the bowl and mix it in, let the mixture cool for a minute.

Step 6:
Now add the eggs and use a blender or a whisk to blend it in. Make sure you do this before you go ahead with the next step.

Step 7:
In a separate bowl, combine the dry ingredients – combine flour, baking soda, baking powder, cocoa powder,  salt. Mix well.

Step 8:
Add the mix from step 7, to the batter of step 6.

I prefer Adding a little amount of the dry mix and mixing it well. Then followed by little more amount and so on. This makes it easier to mix.

Step 9:
Pour in vegetable oil and use the hand blender one Last time for about 2 minutes.

This will make sure your batter is homogenous.

Step 10:
Keep your baking dish ready with baking paper (or the alternative). 
Add your batter to the baking dish, fill it about 1 cm less. This will prevent your batter from spilling out, when it begins to rise.

Step 11:
Place the baking dish in the oven and bake it for 1.5 hours maximum at 300°F or 150°c.

Keep a Check on your cake with a knife. For a perfect bake, your knife will come out clean, when poked deep in the cake at the centre point.

Step 12:
Once the cake is done, all it to cool for good 15 minutes. Take it out and enjoy! 
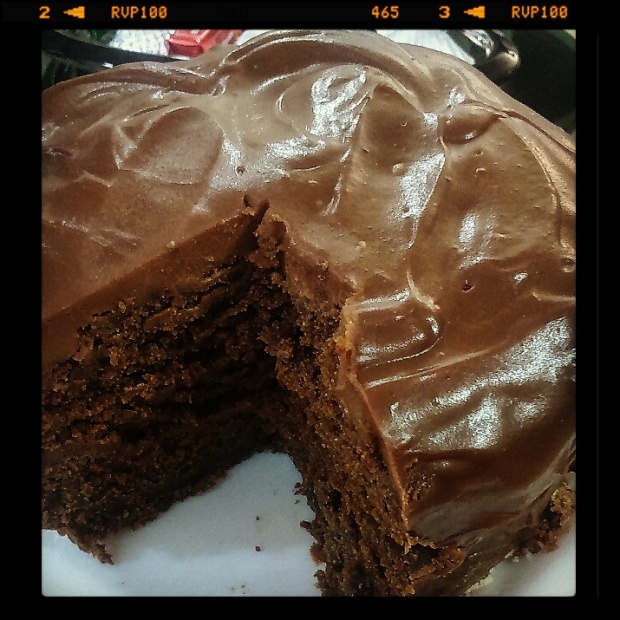
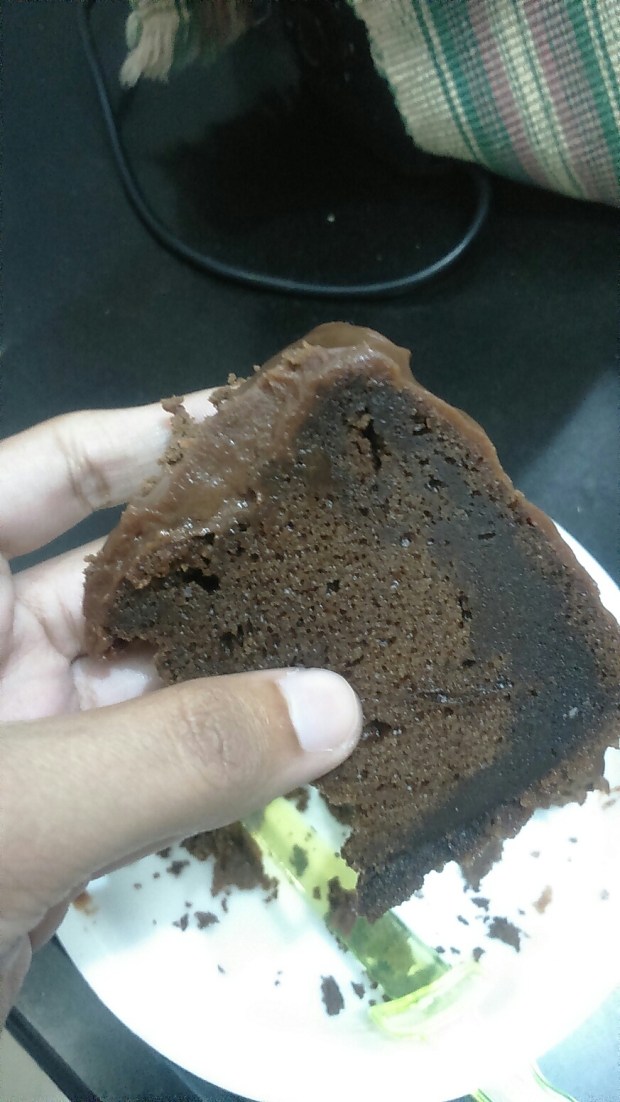
I covered mine in Chocolate Ganache cream.

image

HACKS :
Chocolate – I used Dairy Milk Silk which is fairly sweet enough, so I reduced the amount of sugar I put in the batter.
Butter – I used Amul Butter, which is salted. So I just skipped adding salt to the batter.

image

Love,
J

Thank you for Reading this Post!  Hope you find this helpful. If you have any questions, comments or questions, feel free to comment here or fill the contact form.
Have a Wonderful Day! 😊